- install
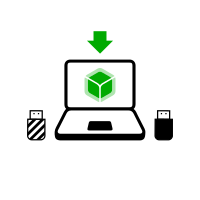
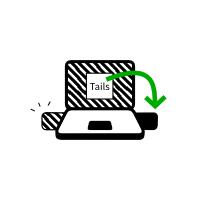
- Tails von Linux installieren
Sie brauchen
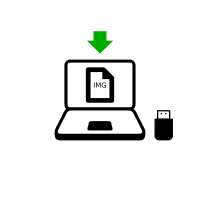
1 USB-Stick
Nur für Tails!
8 GB minimum
Ihr Tails
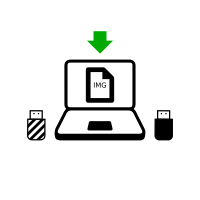
1 USB-Stick
All data will be lost!
8 GB minimum
Windows 7
or later
macOS 10.10
Yosemite
or later
Linux
any distribution
Debian
Ubuntu
or another derivative
Another Tails
USB stick or DVD
Intel processor
not Apple M1 or M2
Smartphone
or printer
to follow the instructions
1 hour in total
½ hour
¼ hour
1.4 GB to download
½ hour to install
½ hour to upgrade
Detailed system requirements and recommended hardware.
Summary
Tails works on:
- Most PC computers that are less than 10 years old
- Some older Mac computers with an Intel processor
Tails does not work:
- Newer Mac computers with an Apple processor (M1 or M2)
- Smartphones or tablets
- Raspberry Pi
Tails might not work on:
Some older computers, for example, if they don't have 2 GB of RAM.
Some newer computers, for example, if their graphics card is incompatible with Linux. Nvidia or AMD Radeon cards often do not work in Tails.
See our list of known hardware compatibility issues.
Detailed hardware requirements
A USB stick of 8 GB minimum or a recordable DVD.
All the data on this USB stick or DVD is lost when installing Tails.
The ability to start from a USB stick or a DVD reader.
A 64-bit x86-64 IBM PC compatible processor.
2 GB of RAM to work smoothly.
Tails can work with less than 2 GB RAM but might behave strangely or crash.
Recommended hardware
Laptop models evolve too rapidly for us to be able to provide an up-to-date list of recommended hardware. Below are some guidelines if you, or your organization, are considering acquiring a laptop dedicated to running Tails.
For PC
Avoid "gaming" models with Nvidia or AMD Radeon graphics cards.
Consider buying a refurbished laptop from a high-end (professional) series. These are cheaper and will last longer than new but lower-quality laptops.
For example, the Lenovo ThinkPad series work well with Tails, including the X250, X1 Carbon, T440, T480, and T490 models.
If you live in a part of the world where buying refurbished laptops is uncommon, look on eBay and Amazon. Amazon offers a 90-day Amazon Renewed Guarantee.
Consider buying a new laptop from vendors who guarantee the compatibility with Linux and Tails like ThinkPenguin.
For Mac
Unfortunately, we don't know of any Mac model that works well in Tails and can run the latest macOS version.
Ihre Schritte
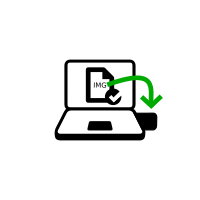
Tails downloaden
Tails downloaden
Download the upgrade
Überprüfen Sie Ihren Download

Überprüfen Sie Ihren Download

Überprüfen Sie Ihren Download

Restart on the other Tails

Download balenaEtcher
Install balenaEtcher
Download balenaEtcher
Install balenaEtcher
Install Tails using balenaEtcher
Install Tails using GNOME Disks
Install Tails using dd
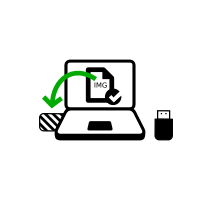
Install intermediary using balenaEtcher
Install intermediary using GNOME Disks
Install intermediary using GNOME Disks

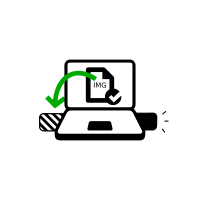
Restart on your Tails USB stick
Restart on intermediary

Restart on intermediary
Install Tails by cloning
Upgrade your Tails by cloning

Restart on your new Tails

Welcome to Tails!
Warnings: Tails is safe but not magic!
Tails ist sicherer als jedes normale Betriebssystem. Aber weder Tails noch andere Software oder Betriebssysteme können Sie vor allem schützen - auch wenn sie es behaupten.
Die folgenden Empfehlungen werden Sie noch sicherer machen, insbesondere wenn Sie einem großen Risiko ausgesetzt sind.
Schützen Sie Ihre Identität, wenn Sie Tails nutzen

Tails wurde entwickelt, um Ihre Identität zu verbergen.
Aber einige Ihrer Aktivitäten könnten Ihre Identität preisgeben:
- Das Teilen von Dateien mit Metadaten, so wie Datum, Uhrzeit, Standort und Geräteinformationen
- Tails für mehr als einen Zweck zur gleichen Zeit benutzen
Einschränkungen des Tor-Netzwerkes

Tails nutzt das Tor-Netzwerk, weil Tor das stärkste und beliebteste Netzwerk ist, um vor Überwachung und Zensur zu schützen.
Aber Tor hat Grenzen, wenn Sie sich Sorgen machen über:
- Verbergen, dass Du Tor und Tails nutzt
- Schutz Ihrer Online-Kommunikation vor entschlossenen und erfahrenen Angreifern
Reduzieren sie die Risiken, wenn sie unsichere Computer nutzen

Tails kann gefahrlos auf einem Computer ausgeführt werden, der einen Virus hat.
Aber Tails kann Sie nicht immer schützen, zum Beispiel bei:
- Installation von einem infizierten Computer
- Tails auf einem Computer mit einem kompromittierten BIOS, Firmware oder Hardware ausführen
Schützen Sie Ihre Identität, wenn Sie Tails nutzen
Löschen Sie die Metadaten von Dateien, bevor Sie diese teilen
Viele Dateien beinhalten versteckte Daten oder Metadaten:
JPEG und andere Bilddateiformate beinhalten oftmals Informationen darüber, wo ein Bild aufgenommen wurde und welche Kamera benutzt wurde.
Office-Dokumente beinhalten oftmals Informationen über den Autor, das Datum und die Uhrzeit, wann das Dokument erstellt wurde.
To help you clean metadata, Tails include Metadata Cleaner, a tool to remove metadata in a wide range of file formats.
Metadata has been used in the past to locate people from pictures they took. For an example, see NPR: Betrayed by metadata, John McAfee admits he's really in Guatemala.
Use Tails sessions for only one purpose at a time
If you use Tails sessions for more than one purpose at a time, an adversary could link your different activities together.
For example, if you log into different accounts on the same website in a single Tails session, the website could determine that the accounts are used by the same person. This is because websites can tell when 2 accounts are using the same Tor circuit.
To prevent an adversary from linking your activities together while using Tails, restart Tails between different activities. For example, restart Tails between checking your work email and your whistleblowing email.
We are not aware of any such attacks to deanonymize people online who used Tails for different purposes at a time.
If you worry that the files in your Persistent Storage could be used to link your activities together, consider using a different Tails USB stick for each activity. For example, use one Tails USB stick for your activism work and another one for your journalism work.
Einschränkungen des Tor-Netzwerkes
Tails macht deutlich, dass Sie Tor und wahrscheinlich Tails verwenden
Alles, was Sie im Internet von Tails aus tun, geht über das Tor-Netzwerk.
Tor und Tails schützen dich nicht, indem sie dich wie einen beliebigen Internetnutzer aussehen lassen, sondern indem sie alle Tor- und Tails-Nutzer gleich aussehen lassen. Es wird unmöglich zu wissen, wer wer unter ihnen ist.
Dein Internetdienstanbieter (ISP) und dein lokales Netzwerk können sehen, dass du dich mit dem Tor-Netzwerk verbindest. Sie können aber nicht wissen, welche Seiten du besuchst. Um zu verbergen, dass du dich mit Tor verbindest, kannst du eine Tor-Brücke benutzen.
The sites that you visit can know that you are using Tor, because the list of exit nodes of the Tor network is public.
Parental controls, Internet service providers, and countries with heavy censorship can identify and block connections to the Tor network that don't use Tor bridges.
Many websites ask you to solve a CAPTCHA or block access from the Tor network.
Exit nodes can intercept traffic to the destination server
Tor hides your location from destination servers, but it does not encrypt all your communication. The last relay of a Tor circuit, called the exit node, establishes the actual connection to the destination server. This last step can be unencrypted, for example, if you connect to a website using HTTP instead of HTTPS.

The exit node can:
Observe your traffic. That is why Tor Browser and Tails include tools, like HTTPS Everywhere, to encrypt the connection between the exit node and the destination server, whenever possible.
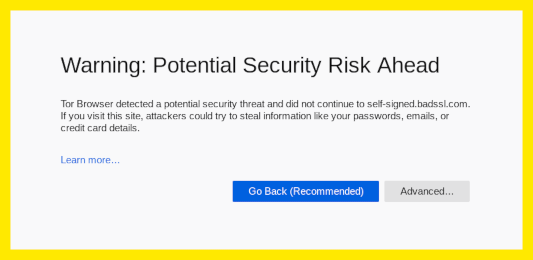
Pretend to be the destination server, a technique known as machine-in-the-middle attack (MitM). That is why you should pay even more attention to the security warnings in Tor Browser. If you get such a warning, use the New Identity feature of Tor Browser to change exit node.
To learn more about what information is available to someone observing the different parts of a Tor circuit, see the interactive graphics at Tor FAQ: Can exit nodes eavesdrop on communications?.
Tor exit nodes have been used in the past to collect sensitive information from unencrypted connections. Malicious exit nodes are regularly identified and removed from the Tor network. For an example, see Ars Technica: Security expert used Tor to collect government e-mail passwords.
Adversaries watching both ends of a Tor circuit could identify users
An adversary, who could control the 3 relays in a circuit, could deanonymize Tor users.
Tor chooses 3 relays that belong to 3 different network operators for each circuit.
Tails takes extra measures to use different circuits for different applications.
The Tor network has more than 6 000 relays. Organizations running Tor relays include universities like the MIT, activist groups like Riseup, nonprofits like Derechos Digitales, Internet hosting companies like Private Internet Access, etc. The huge diversity of people and organizations running Tor relays makes it more secure and more sustainable.
A powerful adversary, who could analyze the timing and shape of the traffic entering and exiting the Tor network, might be able to deanonymize Tor users. These attacks are called end-to-end correlation attacks, because the attacker has to observe both ends of a Tor circuit at the same time.
No anonymity network used for rapid connections, like browsing the web or instant messaging, can protect 100% from end-to-end correlation attacks. In this case, VPNs (Virtual Private Networks) are less secure than Tor, because they do not use 3 independent relays.
End-to-end correlation attacks have been studied in research papers, but we don't know of any actual use to deanonymize Tor users. For an example, see Murdoch and Zieliński: Sampled Traffic Analysis by Internet-Exchange-Level Adversaries.
Reduzieren sie die Risiken, wenn sie unsichere Computer nutzen
Installieren Sie Tails von einem Computer, dem Sie vertrauen
Tails schützt Sie vor Viren und Malware die sich auf Ihrem normalen Betriebssystem befinden, weil Tails unabhängig von anderen Betriebssystemen arbeitet.
Aber Tails wird möglicherweise beeinträchtigt wenn Sie Tails von einem kompromittierten Betriebssystem aus installieren. Diese Tipps reduzieren dieses Risiko:
Installieren Sie Tails unbedingt von einem vertrauenswürdigen Betriebssystem aus. Laden Sie Tails zum Beispiel auf einem Computer ohne Viren herunter oder klonen Sie Tails von einem vertrauenswürdigen Freund.
Do not plug in your Tails USB stick while another operating system is running on the computer.
Nutzen Sie Ihren Tails USB-Stick ausschliesslich um Tails auszuführen. Nutzen Sie Ihren Tails USB-Stick nicht um Daten von oder zu einem anderen Betriebssystem zu transferieren.
Wenn Sie befürchten, dass Tails beschädigt sein könnte, führen Sie ein manual upgrade von einem vertrauenswürdigen Betriebssystem aus durch.
Uns sind keinerlei Viren bekannt, die Tails infizieren könnten. Aber es ist möglich, dass in Zukunft ein solcher Virus existieren könnte.
Kein Betriebssystem kann vor Hardwaremanipulationen schützen
The computer might be compromised if its physical components have been altered. For example, if a keylogger has been physically installed on the computer, your passwords, personal information, and other data typed on the keyboard could be stored and accessed by someone else, even if you are using Tails.
Try to keep your computer in a safe location. Hardware alterations are more likely on public computers, in internet cafés or libraries, and on desktop computers, where a device is easier to hide.
Wenn sie denken, das ein Computer möglicherweise modifiziert wurde, dann:
Nutzen sie einen Passwort Manager um sicher Passwörter einzufügen. So müssen sie das Passwort nicht tippen und es ist nicht im Klartext für z.B. für Kameras oder Leute die ihnen über die Schulter schauen zu erkennen.
Use the screen keyboard, if you are using a public computer or worry that the computer might have a keylogger.
Keylogger sind einfach zu beschaffen und meistens nicht erkennbar. Ein Beispiel sehen sie hier: KeeLog: KeyGrabber forensic keylogger getting started.
Other hardware alterations are much more complicated and expensive to install. For an example, see Ars Technica: Photos of an NSA “upgrade” factory show Cisco router getting implant.
Kein Betriebssystem kann gegen BIOS oder Firmware Angriffe schützen
Firmware umfasst das BIOS oder UEFI und andere Software, die in elektronischen Chips auf dem Computer gespeichert ist. Alle Betriebssysteme, einschließlich Tails, hängen von der Firmware ab, um zu starten und zu laufen, daher kann sich kein Betriebssystem vor einem Firmware-Angriff schützen. Genauso wie ein Auto von der Qualität der Straße abhängt, auf der es fährt, sind auch Betriebssysteme von ihrer Firmware abhängig.
Ihren Computer an einem sicheren Ort aufzubewahren kann Sie vor einigen Firmware-Angriffen schützen, aber einige andere Firmware-Angriffe können aus der Ferne durchgeführt werden.
Firmware-Angriffe sind demonstriert worden, sind aber kompliziert und teuer auszuführen. Wir wissen nichts von einer tatsächlichen Anwendung gegen Tails-Benutzer. Für ein Beispiel siehe: LegbaCore: Stehlen von GPG-Schlüsseln/E-Mails in Tails durch Ferninfektion der Firmware.
Da Sie Ihre digitalen Sicherheitspraktiken immer an Ihre spezifischen Bedürfnisse und Bedrohungen anpassen müssen, möchten wir Sie ermutigen, mehr zu erfahren, indem Sie die folgenden Leitfäden lesen:
Tails downloaden
or download using BitTorrent BitTorrent
Save your download to your usual Downloads folder and not to the USB stick.
We recommend that you save your download to your Persistent Storage. Otherwise, Tails might stop responding if the RAM memory of the computer gets full.
Während des Downloads empfehlen wir Ihnen, die release notes für Tails zu lesen 6.2 . Sie dokumentieren alle Änderungen in dieser neuen Version: neue Funktionen, Probleme, die gelöst wurden, und bekannte Probleme, die bereits identifiziert wurden.
Überprüfen Sie Ihren Download
Verify your download to make sure that it is safe and was not corrupted during download.
Ihr BitTorrent-Client verifiziert den Download automatisch, sobald er abgeschlossen ist.
The verification below is optional for a BitTorrent download.
You seem to have JavaScript disabled. To verify your download, you can either:
Enable JavaScript and reload this page.
Compare manually the checksum of your download with the checksum of our images. In Tails, you can install GtkHash as Additional Software
Verify your download using our OpenPGP signing key and OpenPGP signature. OpenPGP signature.
We don't provide instructions to verify downloads with OpenPGP anymore.
See our security analysis of the different verification techniques.
You seem to be using Internet Explorer. To verify your download, please use a different browser.
or verify using the OpenPGP signature
OpenPGP signature OpenPGP signature
If you don't know how to use the OpenPGP signature, click instead on the button Select your download… to verify your download with JavaScript.
Verifying $FILENAME…
![]() Verification
successful! ($FILENAME)
Verification
successful! ($FILENAME)
![]() Verification
failed! ($FILENAME)
Verification
failed! ($FILENAME)
Most likely, the verification failed because of an error or interruption during the download.
Die Verifizierung schlägt auch fehl, wenn Sie versuchen, eine andere als die neueste Version von Tails zu verifizieren, 6.2 .
Less likely, the verification might have failed because of a malicious download from our download mirrors or due to a network attack in your country or local network.
Downloading again is usually enough to fix this problem. Otherwise, please try downloading from a different place or a different computer.
![]() Error selecting
image.
Error selecting
image.
Make sure that you select a USB image that is readable by your browser.
Make sure that you select an ISO image that is readable by your browser.
![]() Error downloading checksum file from our website.
Error downloading checksum file from our website.
Make sure that your browser is connected to the Internet.
Install Tails using GNOME Disks
Install GNOME Disks.
If you are using the GNOME desktop environment, GNOME Disks should be installed by default.
Otherwise, install the
gnome-disk-utilitypackage using the usual installation method for your distribution.You can also install Tails using the
ddcommand from any Linux distribution as described in our instructions for installing from Debian using the command line.
Starte GNOME Disks (auch bekannt als Disks).
For example, you can press the Super ( ) key,
then type
) key,
then type disksand choose Disks.Choose .
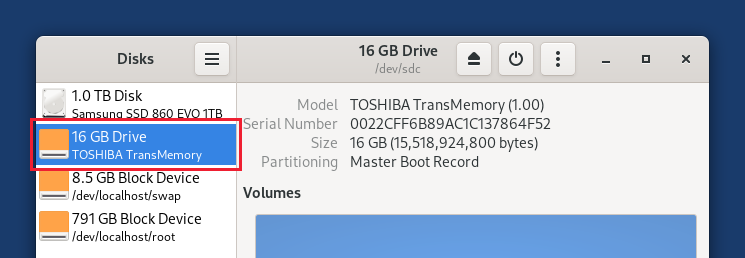
Stecken Sie den Zwischenspeichernden USB-Stick an, auf dem Sie Tails installieren wollen.
Alle Daten auf diesem USB-Stick gehen verloren.
Der persistente Speicher Ihres Tails-USB-Sticks wird nicht in das temporären Tails kopiert.
A new drive appears in the left pane. Click on it.
Click on the
 button in the title bar and choose Restore
Disk Image.
button in the title bar and choose Restore
Disk Image.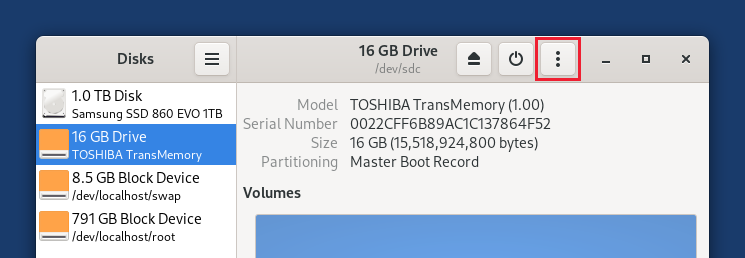
In the Restore Disk Image dialog, click on the file selector button.
Choose the USB image that you downloaded earlier.
Make sure that the USB image is called tails-amd64-6.2.img and has an .img file extension.
If the image has an .iso file extension, it is the wrong image. Please go back to the download step. download step. download step.
Click the Start Restoring button.
Klicken Sie im Bestätigungsdialog auf Wiederherstellen.
Depending on your Linux distribution, you might be asked for your administration password.
The installation takes a few minutes.
After the installation is finished, click on the
 button.
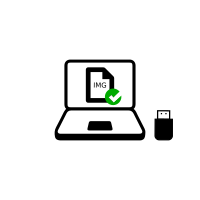
Gut gemacht!
You have installed Tails on your USB stick.
Im nächsten Schritt werden Sie Ihren Computer so einrichten, dass er von diesem USB-Stick startet.
Tails might not work on your computer, so good luck!
If you already started on the other Tails, go directly to step 3: Verify that the other Tails is up-to-date.
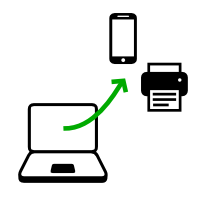
Öffnen Sie diese Anweisungen auf einem anderen Gerät
In the next step, you will shut down the computer. To be able to follow the rest of the instructions afterwards, you can either:
Scan this QR code on your smartphone or tablet:


Print these instructions on paper.
Take note of the URL of this page:
https://tails.net/install/windows?back=1
https://tails.net/install/mac?back=1
https://tails.net/install/linux?back=1
https://tails.net/install/expert?back=1
https://tails.net/install/clone/pc?back=1
https://tails.net/install/clone/mac?back=1
https://tails.net/upgrade/tails?back=1
https://tails.net/upgrade/windows?back=1
https://tails.net/upgrade/mac?back=1
https://tails.net/upgrade/linux?back=1
https://tails.net/upgrade/clone?back=1
Neustart auf dem Zwischen-Tails
Neustart auf dem anderen Tails
Neustart auf Ihrem Tails USB-Stick
Den Computer vom USB-Stick starten lassen
-
Vergewissern Sie sich, dass Sie Tails mit einer der folgenden Methoden installiert haben:
Klicken Sie auf die Schaltfläche Start
.Halten Sie die Shift-Taste gedrückt, während Sie Power ▸ Restart wählen.
Wählen Sie im Bildschirm Option auswählen die Option Gerät verwenden.

Wenn der Bildschirm Option auswählen oder die Option Gerät verwenden nicht angezeigt wird, lesen Sie die Anleitung zum Starten von Tails mit der Boot-Menütaste.
Wählen Sie im Bildschirm Gerät verwenden die Option Boot-Menü.
Windows wird heruntergefahren, der Computer wird neu gestartet, und es wird ein Boot-Menü angezeigt.
Stecken Sie Ihren Tails-USB-Stick ein, kurz nachdem Sie Boot-Menü gewählt haben und während Windows herunterfährt.
In Zukunft empfehlen wir Wir, dass Sie Ihren Tails USB-Stick nur einstecken, wenn Windows heruntergefahren ist. Andernfalls könnte ein Virus in Windows Ihren Tails-USB-Stick infizieren und dessen Sicherheit beeinträchtigen.
Ein solcher Angriff ist theoretisch möglich, in der Praxis jedoch sehr unwahrscheinlich. Wir kennen keinen Virus, der Tails infizieren könnte. Siehe unsere Warnung zum Einstecken von Tails in nicht vertrauenswürdige Systeme.
Das Boot-Menü ist eine Liste der möglichen Geräte, von denen aus gestartet werden kann. Der folgende Screenshot ist ein Beispiel für ein Boot-Menü:
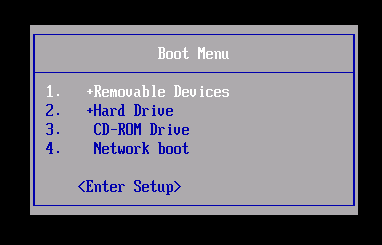
Wählen Sie im Boot-Menü Ihren USB-Stick aus und drücken Sie Enter.
Wenn der Computer mit Tails startet, erscheint der Boot Loader und Tails startet automatisch nach 4 Sekunden.
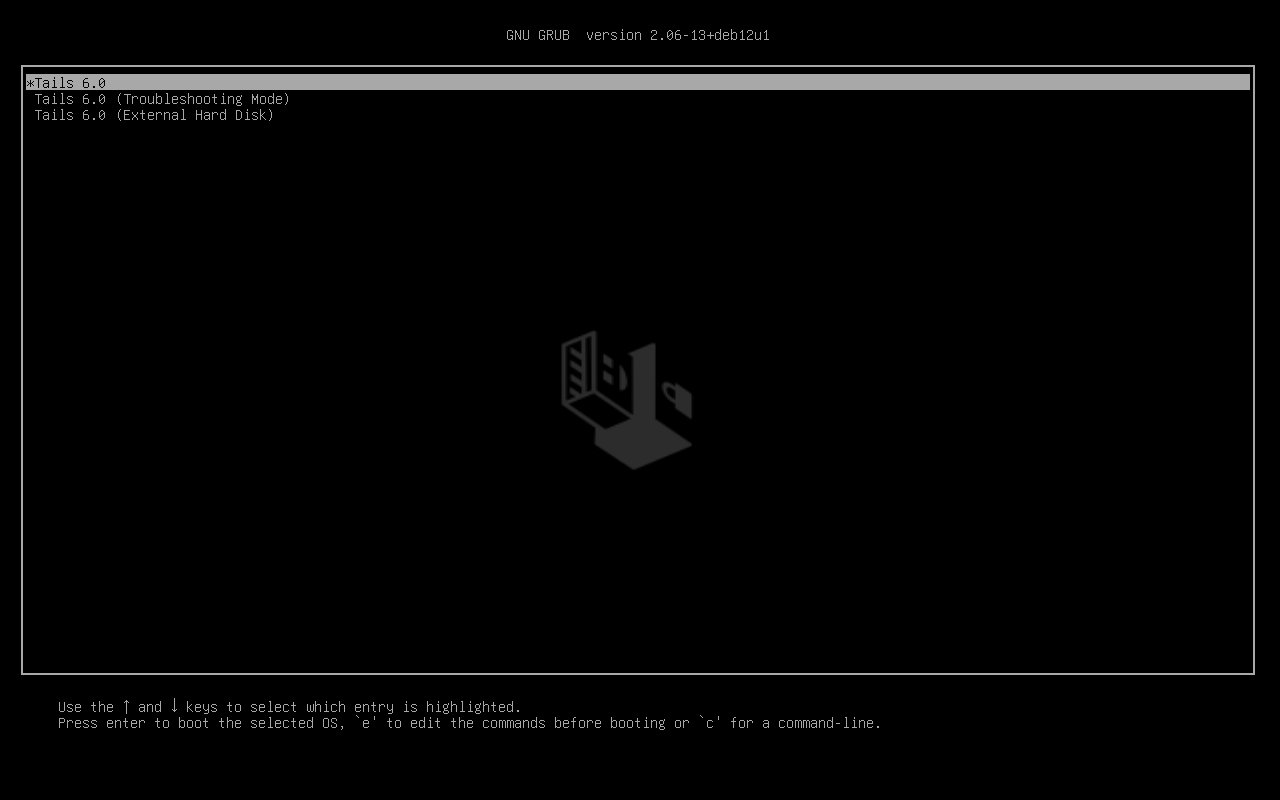
Der Fehlerbehebungsmodus deaktiviert einige Funktionen des Linux-Kernels und könnte auf manchen Computern besser funktionieren. Sie können diese Option ausprobieren, wenn Sie glauben, dass Sie Hardware-Kompatibilitätsfehler beim Starten von Tails haben.
Der Eintrag Externe Festplatte ermöglicht den Start von einer externen Festplatte und einige problematische USB-Sticks.
Die meisten Computer starten nicht automatisch auf dem Tails-USB-Stick, aber Sie können eine Boot-Menü-Taste drücken, um eine Liste der möglichen Geräte anzuzeigen, von denen aus gestartet werden kann.
Wenn Windows 8, 10 oder 11 auch auf dem Computer installiert ist, können Sie stattdessen die Anleitung zum Starten von Tails aus Windows 8 oder 10 verwenden. Tails von Windows aus zu starten ist einfacher als die Verwendung der Boot-Menü-Taste.
Der folgende Screenshot ist ein Beispiel für ein Boot-Menü:
Diese Animation fasst zusammen, wie man mit der Boot-Menü-Taste auf dem USB-Stick startet:
In der folgenden Anleitung wird detailliert erklärt, wie man mit der Taste Boot Menu auf dem USB-Stick startet:
-
Vergewissern Sie sich, dass Sie Tails mit einer der folgenden Methoden installiert haben:
-
Fahre den Compter herunter und lasse dabei den USB Stick eingesteckt.
Shut down the computer and plug in the Tails USB stick.
Schalten Sie den Computer aus.
Plug in the other Tails USB stick that you want to install upgrade from.
Unplug your Tails USB stick while leaving the intermediary USB stick plugged in.
-
Identify the possible Boot Menu keys for the computer depending on the computer manufacturer in the following list:
Manufacturer Key Acer F12, F9, F2, Esc Apple Option Asus Esc Clevo F7 Dell F12 Fujitsu F12, Esc HP F9 Huawei F12 Intel F10 Lenovo F12, Novo MSI F11 Samsung Esc, F12, F2 Sony F11, Esc, F10 Toshiba F12 Others… F12, Esc On many computers, a message is displayed very briefly when switching on that also explains how to get to the Boot Menu or edit the BIOS settings.
-
Schalten Sie den Computer ein.
Immediately press several times the first possible Boot Menu key identified in step 2.
-
If the computer starts on another operating system or returns an error message, shut down the computer again and repeat step 3 for all the possible Boot Menu keys identified in step 2.
If a Boot Menu with a list of devices appears, select your USB stick and press Enter.
Wenn der Computer mit Tails startet, erscheint der Boot Loader und Tails startet automatisch nach 4 Sekunden.
-
Vergewissern Sie sich, dass Sie Tails mit einer der folgenden Methoden installiert haben:
-
Schalten Sie den Computer aus.
Fahre den Compter herunter und lasse dabei den USB Stick eingesteckt.
Plug in the other Tails USB stick that you want to install from.
-
Plug in your Tails USB stick.
-
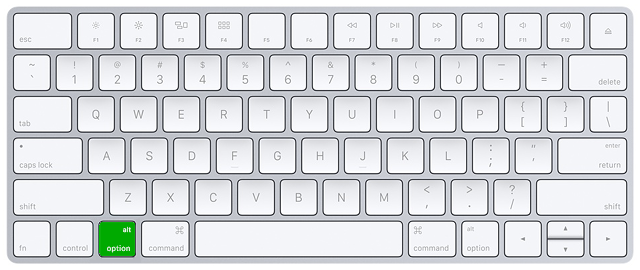
Schalten Sie den Computer ein.
Immediately press-and-hold the Option key (⌥ or Alt key) when the startup sound is played.
Hold the key pressed until a list of possible startup disks appears.
-
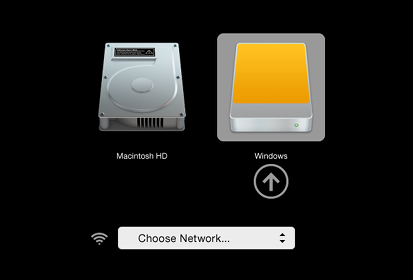
Wählen Sie den USB-Stick aus und drücken Sie Enter. Der USB-Stick erscheint als externe Festplatte und könnte als EFI Boot oder Windows beschriftet sein, wie im folgenden Screenshot:
Wenn der USB-Stick nicht in der Liste der Startlaufwerke erscheint:
Wait 2–3 minutes and try again. Some USB sticks need some rest after installing.
Try all other USB ports on the computer. Some USB ports cannot be used to start from.
Make sure that you have installed Tails using either:
Make sure that you have verified your download of Tails.
Make sure that you have verified your download.
-
Try to install again on the same USB stick.
Try to install again on the same USB stick.
Try to install again on the same USB stick.
Try to install again on the same USB stick.
Try to install again on the same USB stick.
Try to install again on the same USB stick.
Try to install again on the same USB stick.
Try to install again on the same USB stick.
Try to install again on the same USB stick.
Try to install again on the same USB stick.
Try to install again on the same USB stick.
Try to install again on the same USB stick.
Try to install on a different USB stick.
Try to use the same USB stick to start on a different computer.
If your computer still does not display the Boot Loader, it might currently be impossible to start Tails on your computer.
-
If your Mac displays the following error:
Security settings do not allow this Mac to use an external startup disk.
Then you have to change the settings of the Startup Security Utility of your Mac to authorize starting from Tails.
To open Startup Security Utility:
Turn on your Mac, then press and hold Command(⌘)+R immediately after you see the Apple logo. Your Mac starts up from macOS Recovery.
When you see the macOS Utilities window, choose Utilities ▸ Startup Security Utility from the menu bar.
When you are asked to authenticate, click Enter macOS Password, then choose an administrator account and enter its password.
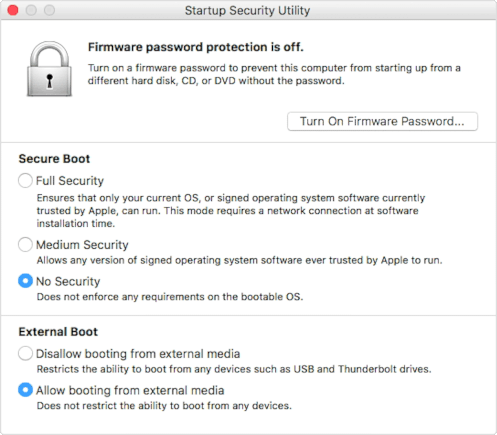
In the Startup Security Utility:
Choose No Security in the Secure Boot section.
Choose Allow booting from external media in the External Boot.
To still protect your Mac from starting on untrusted external media, you can set a firmware password, available on macOS Mountain Lion or later. A firmware password prevents users who do not have the password from starting up from any media other than the designated startup disk.
If you forget your firmware password you will require an in-person service appointment with an Apple Store or Apple Authorized Service Provider.
Read more on Apple Support about:
Wenn der Computer mit Tails startet, erscheint der Boot Loader und Tails startet automatisch nach 4 Sekunden.
Der Fehlerbehebungsmodus deaktiviert einige Funktionen des Linux-Kernels und könnte auf manchen Computern besser funktionieren. Sie können diese Option ausprobieren, wenn Sie glauben, dass Sie Hardware-Kompatibilitätsfehler beim Starten von Tails haben.
Der Eintrag Externe Festplatte ermöglicht den Start von einer externen Festplatte und einige problematische USB-Sticks.
Troubleshoot Tails not starting
-
If no Boot Menu appears, refer to the instructions on starting Tails using the Boot Menu key.
-
If none of the possible Boot Menu keys from the previous technique work, refer to the troubleshooting instructions about Tails not starting at all.
-
If the Boot Menu appears but your USB stick is not listed in the Boot Menu:
Wait 2–3 minutes and try again. Some USB sticks need some rest after installing.
Try all other USB ports on the computer. Some USB ports cannot be used to start from.
-
If your USB stick is listed in the Boot Menu but the Boot Loader does not appear:
If your USB stick appears in the list of startup disks but the Boot Loader does not appear:
Wait 2–3 minutes and try again. Some USB sticks need some rest after installing.
Try all other USB ports on the computer. Some USB ports cannot be used to start from.
Vergewissern Sie sich, dass Sie Tails mit einer der folgenden Methoden installiert haben:
Make sure that you have verified your download of Tails.
Make sure that you have verified your download.
-
Try to install again on the same USB stick.
Try to install again on the same USB stick.
Try to install again on the same USB stick.
Try to install again on the same USB stick.
Try to install again on the same USB stick.
Try to install again on the same USB stick.
Try to install again on the same USB stick.
Try to install again on the same USB stick.
Try to install again on the same USB stick.
Try to install again on the same USB stick.
Try to install again on the same USB stick.
Try to install again on the same USB stick.
Try to install on a different USB stick.
Try to use the same USB stick to start on a different computer.
Wenn Ihr Computer immer noch den Boot-Loader nicht anzeigt, könnte es derzeit unmöglich sein, Tails auf Ihrem Computer zu starten.
-
If the Boot Loader appears but Tails fails to start after the Boot Loader, refer to the troubleshooting section about Tails not starting after the Boot Loader. the troubleshooting section about Tails not starting after the Boot Loader.
Starting the computer using a Boot Menu key can be faster than starting the computer on Windows first and then on Tails. We recommend you learn how to start Tails using the Boot Menu key if you use Tails regularly.
Apple does not prioritize collaborating with Free Software projects. Their newest hardware is usually very hard for Free Software developers to get working with Linux, and thus Tails. PC hardware tends to be more open and work better with Linux.
Willkommen bei Tails!
Starting Tails
After the Boot Menu, a loading screen appears.

One to two minutes after the Boot Loader and the loading screen, the Welcome Screen appears.
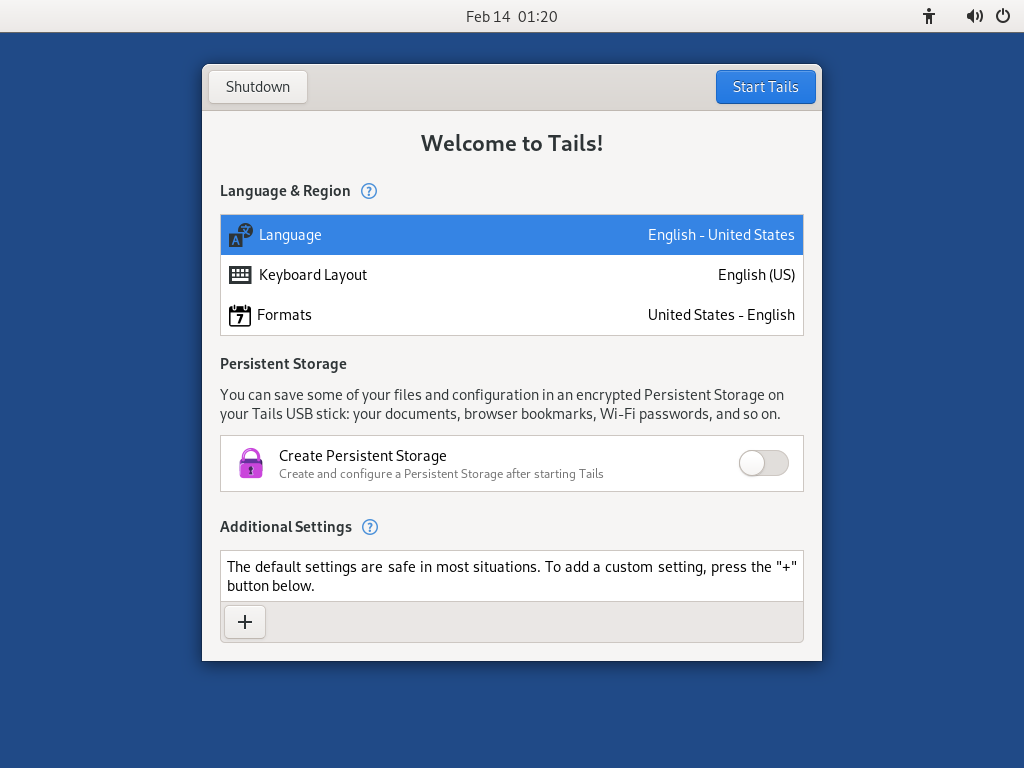
In the Welcome Screen, select your language and keyboard layout in the Language and Formats section. Click Start Tails.
If your keyboard or touchpad doesn't work, try using a USB keyboard or mouse.
Nach 15–30 Sekunden erscheint der Desktop von Tails.

Welcome to your new Tails!
You made it!
You managed to start your new Tails on your computer!
Congratulations on staying safe :)
To continue discovering Tails, read our documentation.
Test your Wi-Fi
Problems with Wi-Fi are unfortunately quite common in Tails and Linux in general. To test if your Wi-Fi interface works in Tails:
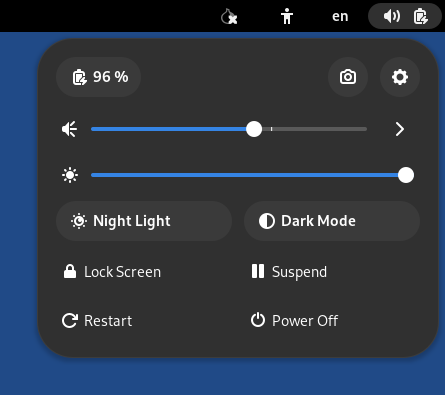
Open the system menu in the top-right corner:
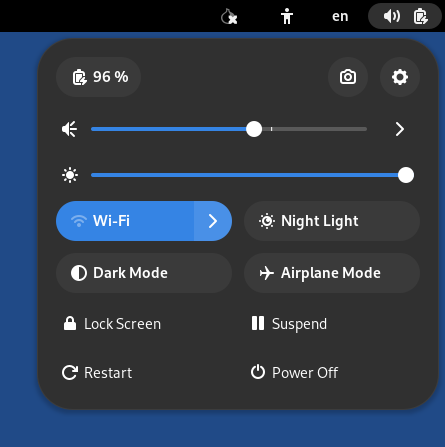
Choose Wi-Fi Not Connected and then Select Network.
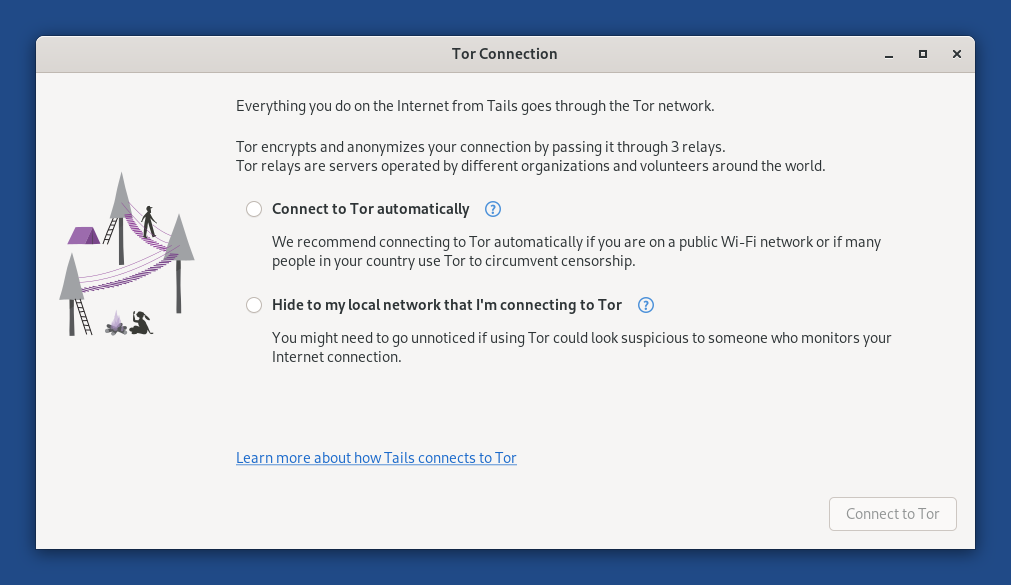
After establishing a connection to a local network, the Tor Connection assistant appears to help you connect to the Tor network.
If your Wi-Fi interface is not working, you might experience the following:
There is no Wi-Fi menu in the system menu:
The interface is disabled because MAC address anonymization failed:
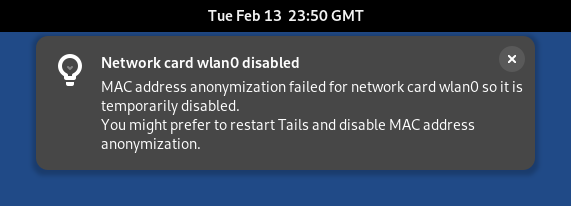
In this case, you can disable MAC address anonymization in the Welcome Screen. Doing so has security implications, so read carefully our documentation about MAC address anonymization.
The following notification appears:
Activation of network connection failed
To connect to the Internet, you can try to:
Use an Ethernet cable instead of Wi-Fi if possible. Wired interfaces work much more reliably than Wi-Fi in Tails.
Share the Wi-Fi or mobile data connection of your phone using a USB cable. Sharing a connection this way is called USB tethering.

See instructions for:
-
Only sharing mobile data works on iPhones and iPads; sharing Wi-Fi does not work.
Tails cannot hide the information that identifies your phone on the local network. If you connect your phone to a:
Wi-Fi network: the network can see the MAC address of your phone.
This has security implications that we explain in our documentation on MAC address anonymization. Some phones have a feature to hide the MAC address of the phone.
Mobile data network: the network is able to know the identifier of your SIM card (IMSI) and the serial number of your phone (IMEI).
-
Buy a USB Wi-Fi adapter that works in Tails:
Vendor Model Size Speed Price Buy offline Buy online Panda Wireless Ultra Nano 150 Mbit/s $18 No Amazon Panda Wireless PAU05 Small 300 Mbit/s $65 No Amazon ThinkPenguin TPE-N150USB Nano 150 Mbit/s $74 No ThinkPenguin If you find another USB Wi-Fi adapter that works in Tails, please let us know. You can write to tails-support-private@boum.org (private email).
Check in our list of known Wi-Fi issues if there is a workaround to get your Wi-Fi interface to work in Tails.